Being a software engineer by heart I am a big fan of automating any recurring manual task.
Every time we would develop a static website I would need to manually setup the whole infrastructure for it to work properly. This was a very repetitive and tedious task that we wanted to automatize.
In this article you will find our approach using AWS CloudFormation.
Our usual infrastructure architecture is as follows:
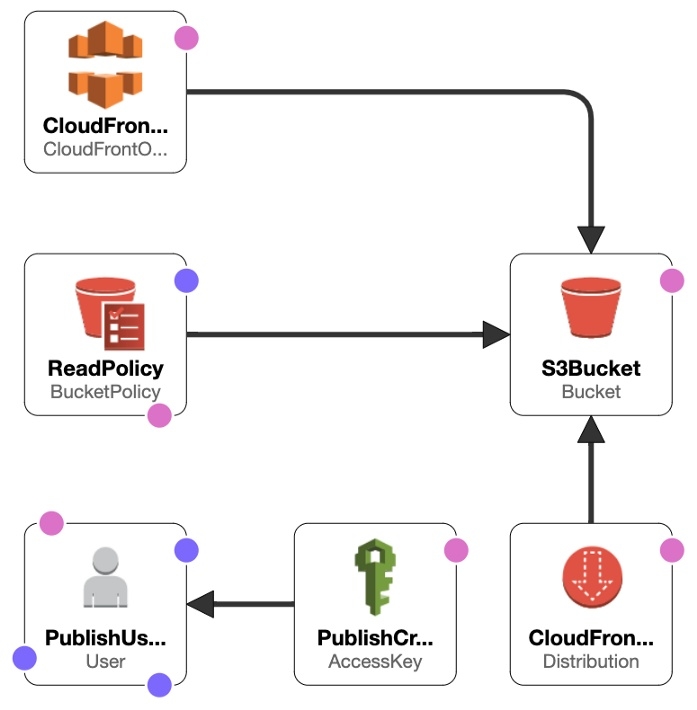 AWS - Static website infrasctructure architecture
The first time I got acquainted with AWS CloudFormation was in an AWS training program.
At the beginning of each of the practical exercises, the environment was loaded by running a stack on CloudFormation through a YAML file. I was mindblown 🤯. I immediately thought that this would allow me to automate the creation of the whole infrastructure for static website hosting.
Another very interesting feature is that every resource created via the CloudFormation stack is erased when the stack itself is deleted. This is very useful to rollback the creation of resources when we detect mistakes, saving us precious time and money.
CloudFormation syntax
As a piece of advice, before starting to set up a stack in CloudFormation, draft the needed resources in a sheet of paper 📜. You should then be prepared to jump into the CloudFormation designer.
The yaml has 3 main sections parameters, resources, and outputs:
Parameters allow you to ask for inputs before running the stack.
In the following example, we create an input parameter that will define the bucket name when creating the S3 resource.
BucketName:
  Type: String
  Default: 'a-proper-bucket-name'
This is where you instantiate the actual services.
In this example, we create an S3Bucket configured as a static website. Please note how we define the BucketName by using a reference to the parameter / input defined earlier.
S3Bucket:
  Type: 'AWS::S3::Bucket'
  Properties:
    BucketName: !Ref BucketName
    WebsiteConfiguration:
      ErrorDocument: 'index.html'
      IndexDocument: 'index.html'
The outputs allow you to print useful values from the created resources.
In this example, we create an output to display the S3Bucket website url.
BucketUrl:
  Description: 'S3 Bucket Url'
  Value: !GetAtt 'S3Bucket.WebsiteURL'
Complete example
AWSTemplateFormatVersion: '2010-09-09'
Description: 'Static website hosting with S3 and CloudFront'

Parameters:
  BucketName:
    Type: String
    Default: 'a-proper-bucket-name'

Resources:
  # Create the bucket to contain the website HTML
  S3Bucket:
    Type: 'AWS::S3::Bucket'
    Properties:
      BucketName: !Ref BucketName
      WebsiteConfiguration:
        ErrorDocument: 'index.html'
        IndexDocument: 'index.html'

  # Configure the bucket as a CloudFront Origin
  ReadPolicy:
    Type: 'AWS::S3::BucketPolicy'
    Properties:
      Bucket: !Ref S3Bucket
      PolicyDocument:
        Statement:
          - Action: 's3:GetObject'
            Effect: Allow
            Resource: !Sub 'arn:aws:s3:::${S3Bucket}/*'
            Principal: '*'
            # In an ideal scenario the policy would only grant these rights to CloudFront,
            # we do not do it from scratch as many projects start without having a domain name specified
            # and we want to test the code as soon as possible.
            # Principal: CanonicalUser: !GetAtt CloudFrontOriginAccessIdentity.S3CanonicalUserId

  # Configure Access to CloudFroun
  CloudFrontOriginAccessIdentity:
    Type: 'AWS::CloudFront::CloudFrontOriginAccessIdentity'
    Properties:
      CloudFrontOriginAccessIdentityConfig:
        Comment: !Ref S3Bucket

  # Configure CloudFront
  CloudFrontDistribution:
    Type: 'AWS::CloudFront::Distribution'
    Properties:
      DistributionConfig:
        CustomErrorResponses:
          - ErrorCode: 403 # not found
            ResponseCode: 404
            ResponsePagePath: '/index.html'
        DefaultCacheBehavior:
          AllowedMethods:
            - GET
            - HEAD
            - OPTIONS
          CachedMethods:
            - GET
            - HEAD
            - OPTIONS
          Compress: true
          DefaultTTL: 3600 # in seconds
          ForwardedValues:
            Cookies:
              Forward: none
            QueryString: false
          MaxTTL: 86400 # in seconds
          MinTTL: 60 # in seconds
          TargetOriginId: s3origin
          ViewerProtocolPolicy: 'allow-all'
        # This DefaultRootObject configuration is not enough.
        DefaultRootObject: '/index.html'
        Enabled: true
        HttpVersion: http2
        Origins:
          - DomainName: !GetAtt 'S3Bucket.DomainName'
            Id: s3origin
            S3OriginConfig:
              OriginAccessIdentity: !Sub 'origin-access-identity/cloudfront/${CloudFrontOriginAccessIdentity}'
        PriceClass: 'PriceClass_All'

  # Create an IAM user with Access Keys to enable automated deployment of the website to this bucket
  PublishUser:
    Type: 'AWS::IAM::User'
    Properties:
      Policies:
        - PolicyName: !Sub 'publish-to-${S3Bucket}'
          PolicyDocument:
            Statement:
              - Action: 's3:*'
                Effect: Allow
                Resource:
                  - !Sub 'arn:aws:s3:::${S3Bucket}'
                  - !Sub 'arn:aws:s3:::${S3Bucket}/*'

  PublishCredentials:
    Type: 'AWS::IAM::AccessKey'
    Properties:
      UserName: !Ref PublishUser

Outputs:
  Bucket:
    Description: 'S3 Bucket Name'
    Value: !Ref S3Bucket
  BucketUrl:
    Description: 'S3 Bucket Url'
    Value: !GetAtt 'S3Bucket.WebsiteURL'
  AccessKeyId:
    Description: 'S3 Access Key'
    Value: !Ref PublishCredentials
  AccessKeySecret:
    Description: 'S3 Secret Key'
    Value: !GetAtt PublishCredentials.SecretAccessKey
  DistributionId:
    Description: 'CloudFront Distribution ID'
    Value: !Ref CloudFrontDistribution
  Domain:
    Description: 'Cloudfront Domain'
    Value: !GetAtt CloudFrontDistribution.DomainName
Execution
Now it’s time to benefit from the blueprint created.
First, you need to create a stack, filling in the inputs required by the parameters and then execute it:
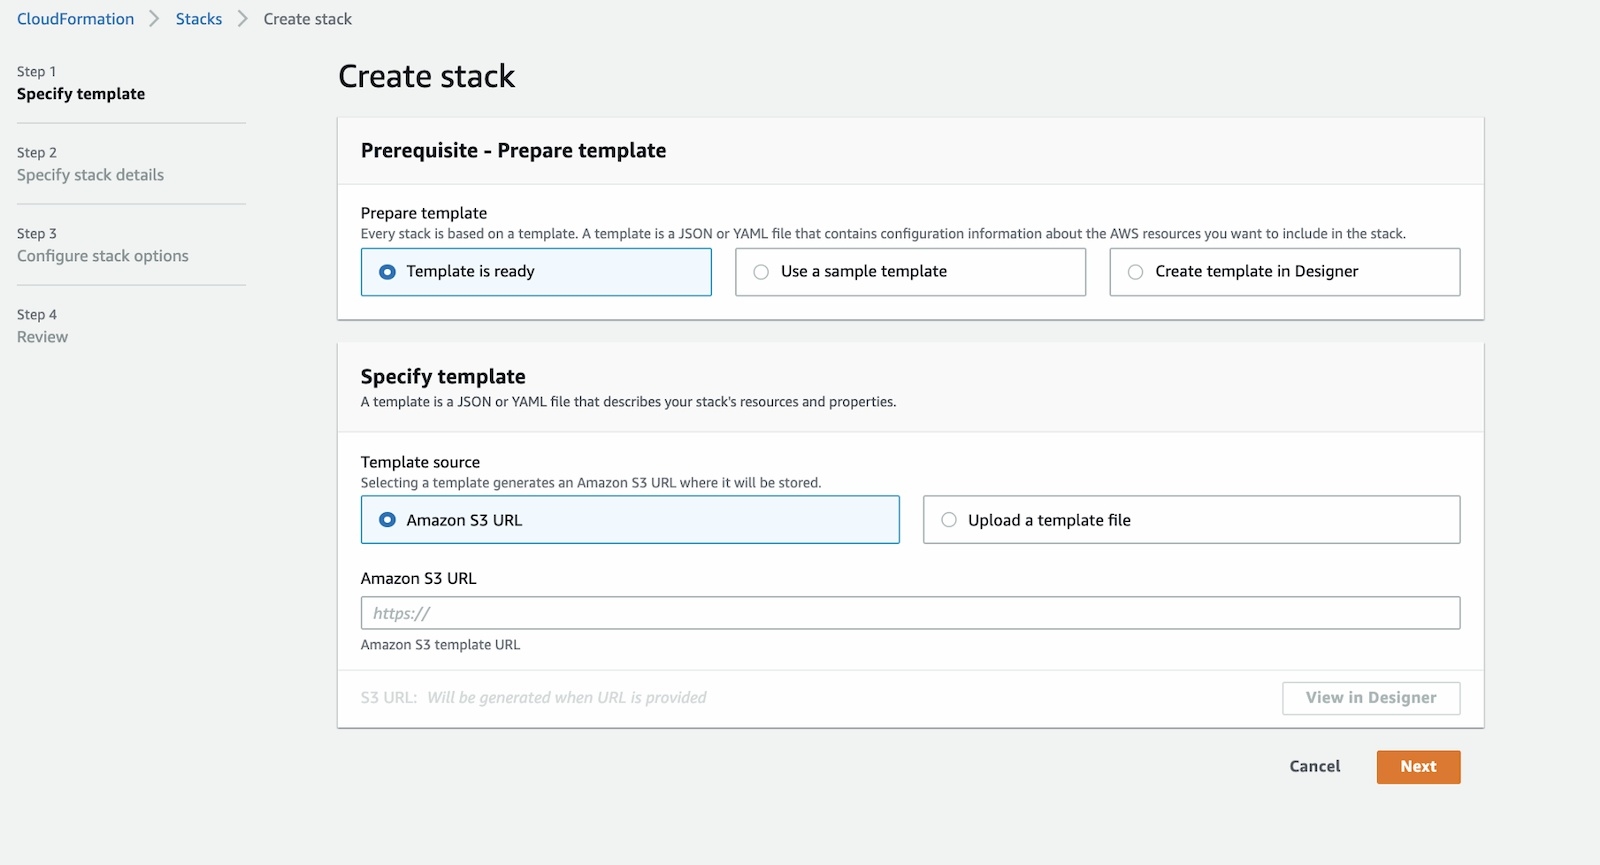 AWS Cloudformation - Create stack snapshot
You can now grab a ☕️ as the execution might take some time until it’s complete. You can check the status of the creation at any time:
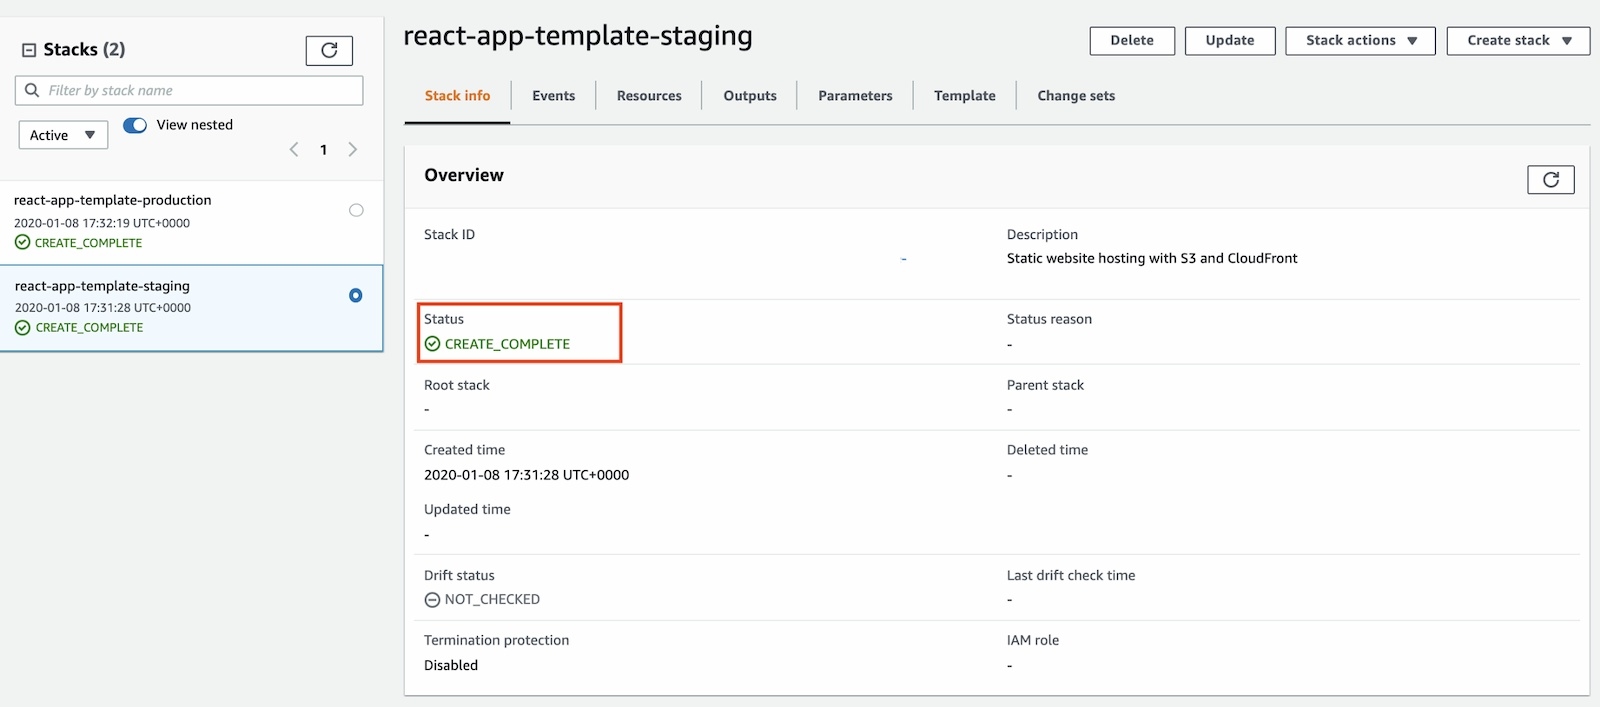 AWS Cloudformation - create stack progress snapshot
⚠️ Please keep in mind that when you delete the stack you also remove all the resources created. This is usefull for testing but you might make the mistake (like we did) of deleting the stack after all the resources are created.
Useful links
